Side Border Series Tutorial 8
Side Border Series Tutorial 8

Things Needed
**Paint Shop Pro (this was done using v.9)
**FM Tile Tools - Seamless Tile Found Here
**Simple Filters - Top Left Mirror Found Here
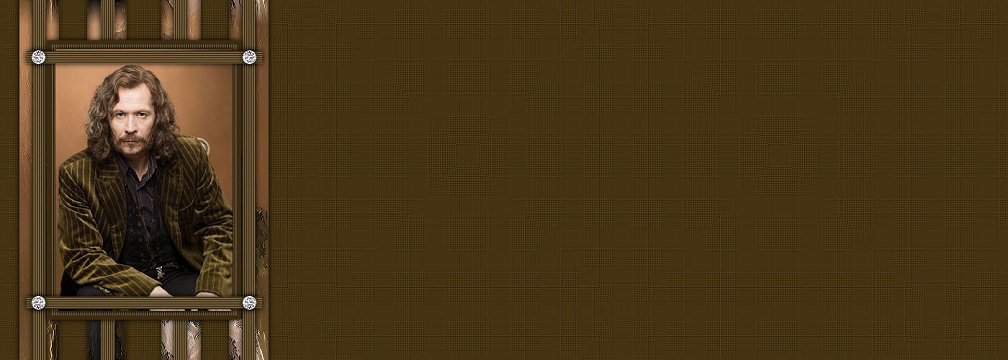
**Graphic of your choice (one that is taller than wider must be used. For best results, graphic should be no wider than 450 pixels wide)
**My Selections and Diamond Tube Found Here
We will be using the Plaid texture that is included in PSP 9. It is included in my Supplies zip incase you need it also.
Please note that all settings remain the same unless otherwise noted throughout tutorial
Before opening up PSP, make sure you install the selections to your PSP/Selections folder and if you don't already have the Plaid texture, put that in your PSP/Textures folder
Let's Get Started!
1. Open your graphic and diamond tube in Paint Shop Pro.
2. Open a new raster image 100x100
Duplicate this new raster image so you have two of them and place them in the left hand top corner in your work space.
Now choose two colors from your graphic. One will be a Dark color which you can set as your background color and the other a lighter to medium color which you can set as your foreground color. For best results, two colors of the same shade will work best.
Flood fill the two raster images with your 2 colors. This is to save them incase they disappear from your color palette...
3. Edit/Copy your image and Edit/Paste/Paste as a new image and minimize the original
4. Open a new raster image 400x500
5. Layers/New raster layer
6. Selections/Load Save Selections/Load Selections From Disk and load the SB8-Sel1_JM Selection (Make sure Source Luminance and Replace Selection are marked)
7. Edit/Paste/Paste into Selection
8. Adjust/Blur/Gaussian Blur at 5
**Please note that for busy and colorful graphics, a gaussian blur setting of 15 will work better. It will smooth it out better**
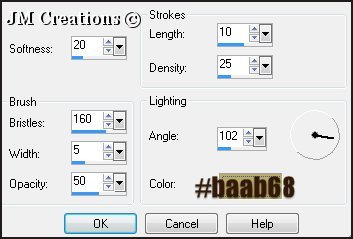
9. Effects/Art Media Effects/Brush Strokes:
***And Select None***
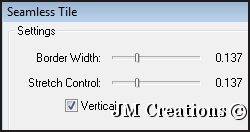
10. Effects/Plugins/FM Tile Tools/Seamless Tile using the following settings:
11. Effects/3D Effects/Drop Shadow:
V&H=0, Opacity=100, Blur=12, Color=Black and Select None
Shadow on new layer is checked
12. Effects/Image Effects/Drop Shadow using Corner and Vertical. Vertical Offset=0, and Transition=50
13. Layers/Merge/Merge Visible
14. Layers/New Raster Layer
15. Selections/Load Save Selections/Load Selection From Disk and load the SB8-Sel2_JM Selection
16. Flood Fill with your dark color
17. Effects/Texture Effects/Blinds with the following settings: Use your light color as the color choice

18. Effects/3D Effects/Drop Shadow and select none. Make sure shadow on new layer is Not checked
19. Effects/Image Effects/Seamless Tile using Corner and Vertical (same settings as previously used)
20. Layers/New Raster Layer
21. Selections/Load Save Selections/Load Selections From Disk and load the SB8-Sel3_JM Selection
22. Flood Fill with your dark color and then go to Selections/Modify/Contract by 6
Flood fill settings set to Match Mode=None, Blend Mode=Normal, Opacity=100
23. Flood fill with your lighter color
24. Effects/Texture Effects/Blinds and change the color to your dark color (all other settings remain the same)
25. Selections/Modify/Contract by 6
26. Edit/Paste/Paste into Selection
27. Effects/3D Effects/Drop Shadow and then select none
This drop shadow is used to give definition to just your graphic that was pasted into selection
28. Effects/3D Effects/Drop Shadow
We are adding a second drop shadow here to highlight your whole graphic (frame and all)
29. Layers/New Raster Layer
30. Selections/Load Save Selections/Load Selections From Disk and load the SB8-Sel4_JM Selection
31. Flood fill with your dark color and then go to Effects/Texture Effects Blinds. Change your color back to your light color and check the box that says Horizontal
32. Effects/3D Effects/Drop Shadow and Select None
33. Layers/Merge/Merge Visible
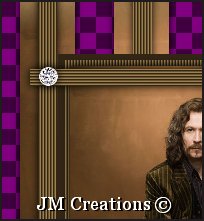
34. Now place the diamond in the left corner of your graphic
35. Effects/3D Effects/Drop Shadow
36. Effects/Plugins/Simple/Top Left Mirror
37. Layers/Merge/Visible
38. Image/Canvas Size 1400x500. Placement is Left Middle Arrow
(If your screen resolution is greater than 1400 you can adjust the width to accomodate your needs)
39. Layers/New Raster Layer and move this layer to the bottom
40. Flood fill with dark color
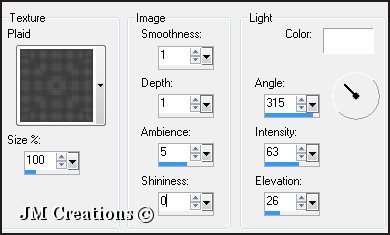
41. Effects/Texture Effects/Texture and choose the Plaid:
42. Layers/Merge/Merge All (Flatten)
43. You can add your watermark and any text if you'd like and then go to File/Export to JPEG Optimizer and Optimize at 15-20 or whatever your preference is...
Arrange in Letter Creator and please link tutorial back to me at
http://www.jmcreationtuts.iwarp.com
Please feel free to snag and share my tutorials after they have been released but please credit back to me in the footer..
If you are a tutorial writer and you would like to use my selections, masks, or other things please email me at
jodim@norwaymi.com
I do allow it, but I require a link back in your tutorial to my website here:
http://www.jmcreationtuts.iwarp.com